

Tip provided by Mike Dawson originally in the Feb 2024 HACOA Newsletter
If you are contemplating installing a used pressure plate, the following may be useful in determining if there are any potential issues. It is always helpful if you personally know the past performance of a pressure plate or if you acquire one from another source, that the previous owner can share the history.
Also you should be familiar with the matched set of clutch parts that must be kept together. Failure to address that can lead to a no engagement or a no release condition. In addition, keep in mind that all original flywheels will fail so be sure and replace yours if it appears original.

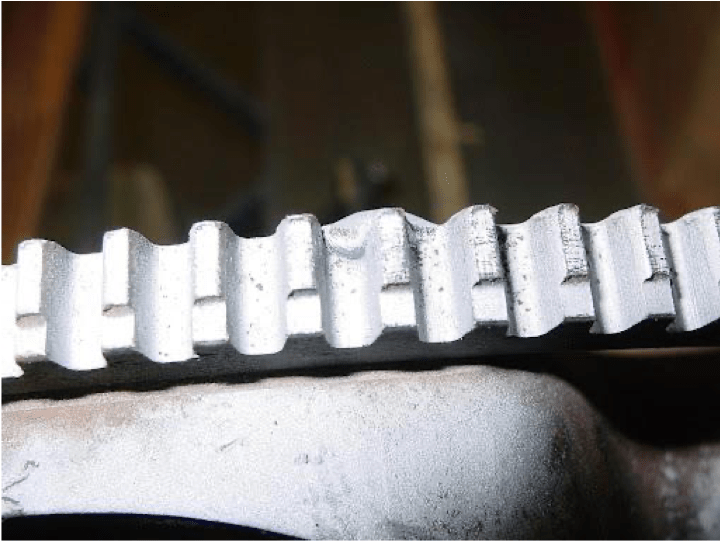
extended into the teeth causing the starter to bind or break
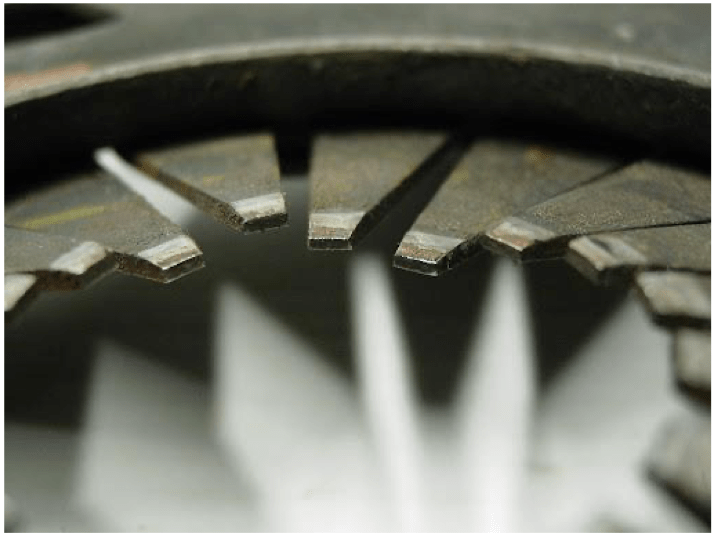

Mark the plate and frame to match during reassembly and separate the two parts. If the spring does not appear broken, use a press to depress the fingers about half an inch and inspect with a flashlight. Blow out any debris or use a wire or pick. Release the pressure and see if the fingers are back in alignment.
possibly from incorrect adjustment allowing the bearing to ride on the fingers continuously
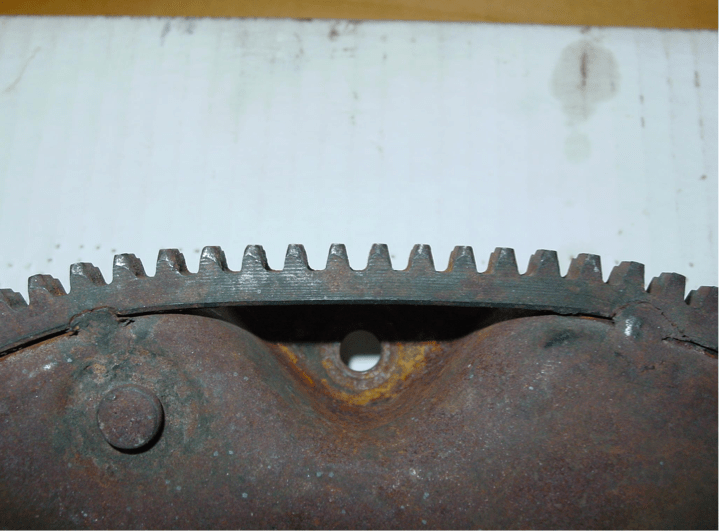

You can measure the clearance (left), with a feeler gauge (0.200 Early and 0.100 Late) but I have found that measurement to vary quite a bit with both originals and rebuilds.
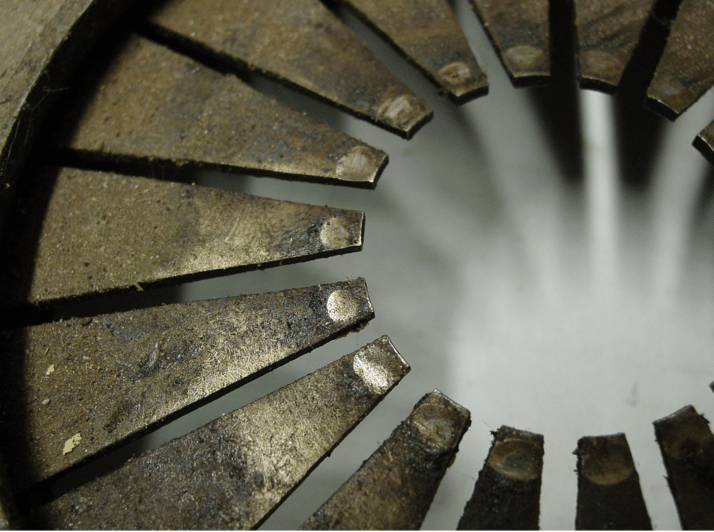
The better check is actual performance (right).
Bolt the flywheel/disc/pressure plate assembly with every other bolt and place in a press. Set up a measurement to record the distance the press piston travels from just touching the fingers to a complete release as judged by pressure on the disc with the thin screwdriver. The disc will slide a short distance to the step of the flywheel when released. The vertical distance has been very consistent in my checks and should be between 5/16 and 7/16 inches for all. If that measurement is greater or less, the clutch may not disengage or it may slip. Your pedal travels much more than that but the final pull of the clutch rod is leveraged through the clutch linkage and the fork. The two arrows in the right picture show the measurement check.
Touching up the face can be done with a DA sander and varying grades of medium paper or if you have hot spots they usually can be removed by careful use of a body sander and coarse discs. Follow up with the DA. If you have heavy grooves, it may be junk; I have not found any shop that will grind a pressure plate since Casper closed. An issue with grinding more than a few thousands is the need to shim the spring to compensate or machine the flywheel outer surface (late model only).
With the price of rebuilt pressure plates from $150 – $300, re-using a known good one may be a consideration.
*SFBA note: Thanks to Mike Dawson and the HCOA for sharing this tech tip. While many of us would decide to either buy a new / rebuilt assembly, like this one from Clarks, or take your Corvair into a mechanic to have the job professionally done, it is important to understand what may be causing you trouble when starting or shifting gears in your Corvair. This is also a helpful tip to understand what to look for if you buy a pressure plate from another Corvair owner or a stranger on marketplace/craigslist/ebay.
Have a transmission story to share?
Broken nose cone blues?
Idea for a future tech tip?
Let us know in the comments!


Leave a comment